

We are here to tell you that learning graphic design is nothing to fear! As beginners, you may be intimidated by design applications an expert uses or some pricy design courses. Worry not, there are actually many resources available for starters that are free!
PowerPoint Design Guide 01: Teaching yourself graphic design
All you need is just the right approach to teach yourself graphic design. Without making more yada-yada, follow our instructions below:
Step 1: Find reliable resources for graphic design information
Several websites offer graphic design resources and information. Not all the information you find on the internet is reliable, which means you’ll need to do some research to find the best online resources. We recommend you to visit Freepik, that website is a good resource to dig in about design graphics, and also, you can download free clipart features.
Step 2: Gather as much information as possible on design theory
Graphic design is an art form, and you need to study the theory behind any art form to understand it truly. You need to know the fundamental design because so many people make the mistake of jumping into a program like Photoshop without understanding the basics. Jumping into such tools recklessly can lead you to failure. All in all, just take your time to learn everything from scratch.
Step 3: Choose a niche for what you do
A great designer isn’t one who masters everything, but they can be specific about their expertise. By creating a niche, you can dedicate yourself to that topic and learn everything more in-depth. There is an old saying, “A jack of all trades is a master of none” this simply means that if you try to be great at everything, you’ll never master anything. And you know what? The industry-leading designers are masters of a specific area of design.
Step 4: Acquire the applications needed for your area of design
Different areas of expertise require various applications. If you’re going to be a logo designer, you’ll be primarily working in a vector application like Illustrator. If you’re doing print design, you’ll most likely be working on a layout application like InDesign. Most designers have access to all of these types of programs, but when you’re first starting to learn graphic design, focus on the application that corresponds to your specific area of study.
It’s important to note that you do not need to go out and purchase an expensive application to be a graphic designer. While the Adobe applications are the most popular, there are several free alternatives to the software that Adobe provides. If you’re more comfortable sticking with the Adobe applications, consider getting a subscription to the one app you’ll be using the most, this will save your costs and help you focus on learning one app at a time.
Step 5: Use various resources to master your design application
Find some tutorials for the application you’ll be using for your design work. There are millions of tutorials in audio, video, and text form available for free online. You may also consider purchasing a book written about the application you’re trying to learn. Most tutorials will give you a new skill set and provide some work to add to your portfolio. These books and tutorials are also a great way to reinforce what you learned while studying design theory.
The most important thing is to get out there and practice. Apply the skills you’ve learned to everyday objects. Identify good and bad design. Work on projects and gather as much information as you possibly can. Graphic design isn’t a static skill and designers on every level must continue to learn every single day.
See also: 6 Ways to Compress Files in PowerPoint
PowerPoint Design Guide 02: How to boost your design confidence
If there are one thing designers share in common, it’s a lack of confidence. Many designers refuse to show their design because they’re afraid of what people might think about it. Well, you can’t live like that forever, do you? One crucial thing designers’ should have is the ability to connect with great and potential clients.

Make sure you already know how to kick the creator’s block because this step won’t have any effects if you don’t know! Here are a few steps to boost your design confidence.
Step 1: Know your strengths and weaknesses
A lack of confidence may happen when you’re too focused on things you can’t do. And yet, every designer has a specialty. Some are experts in typography, and the rest are not. No one masters it all. Kick out that shabby feeling by writing down the things you’re good at and the ones you need to improve. Once you realize how strong you are in those areas, it’s easier to build your confidence.
Step 2: Stop comparing
Having a role model is good, but never compare yourself to them. You and your role model are completely different people with different backgrounds and problems and so on. What makes you think you should be like them? You might think they are the best now, but remember there are times that they are beginners, just like you. Remember that you are your person. You can’t keep comparing yourself to others and expect to get great results. You can adapt their best practices, and find inspiration in the work that they do.
Step 3: Receive feedback
Have a masterpiece design? Show it off! A lot of people are avoiding feedback because they are afraid of what people might say. But the truth is, other’s feedback is the one that pushes you up to be better!
Negative feedback? Take this constructively. Stop feeling bad about every mean comment you receive, because whether you admit it or not, your work has its share of imperfections. Positive feedback? Here you go. Sometimes it needs one sentence to boost your confidence.
Step 4: Never stop practicing
You feel like you have put everything into your design, but the output is not like you imagine. Then, don’t stop practicing! You have to keep it going. The more work you produce, the more mistakes you’ll make, and hopefully, the more lessons you’ll learn.
Step 5: Trust your learning process
Do your experiment and put everything into it. Now let yourself trust whatsoever a piece of art that you yourself make. No matter how compelling your design process, if you don’t believe it with your whole heart, then nothing good will come out of it. Start trusting your design process a bit more so that you can gain confidence not only in your output but in yourself as well.
See also: How to Highlight Text in a Microsoft PowerPoint
PowerPoint Design Guide 03: How to organize long texts and charts
Everyone sure hates complex texts and charts in a presentation.

How to make charts
And here we give you a quick direction to organize them in a manual but better way.
Step 1: Make sure the information in the chart is readable
Sometimes the information in the charts is so small and not readable.
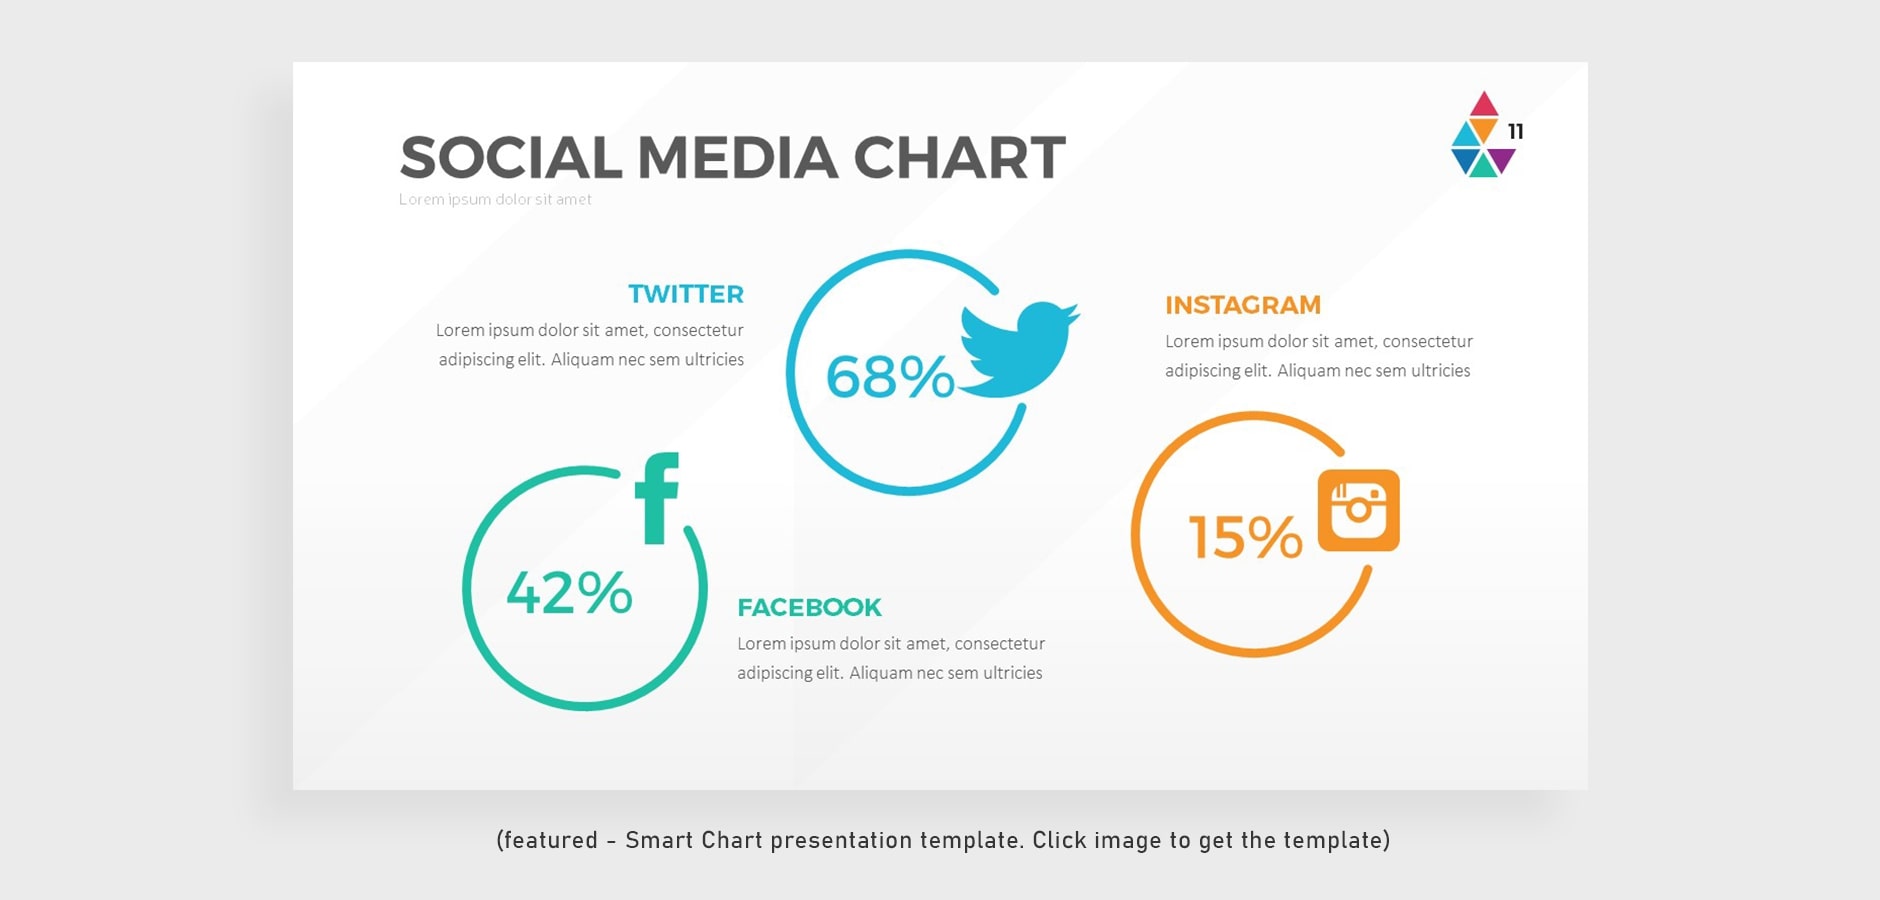
So, ensure all numbers and text in the charts are easy on the eyes with sans serif fonts in proper size.
Step 2: Use colors that help the audience understand the content
Default charts usually have a pale and dull color and somehow can’t represent the whole presentation.
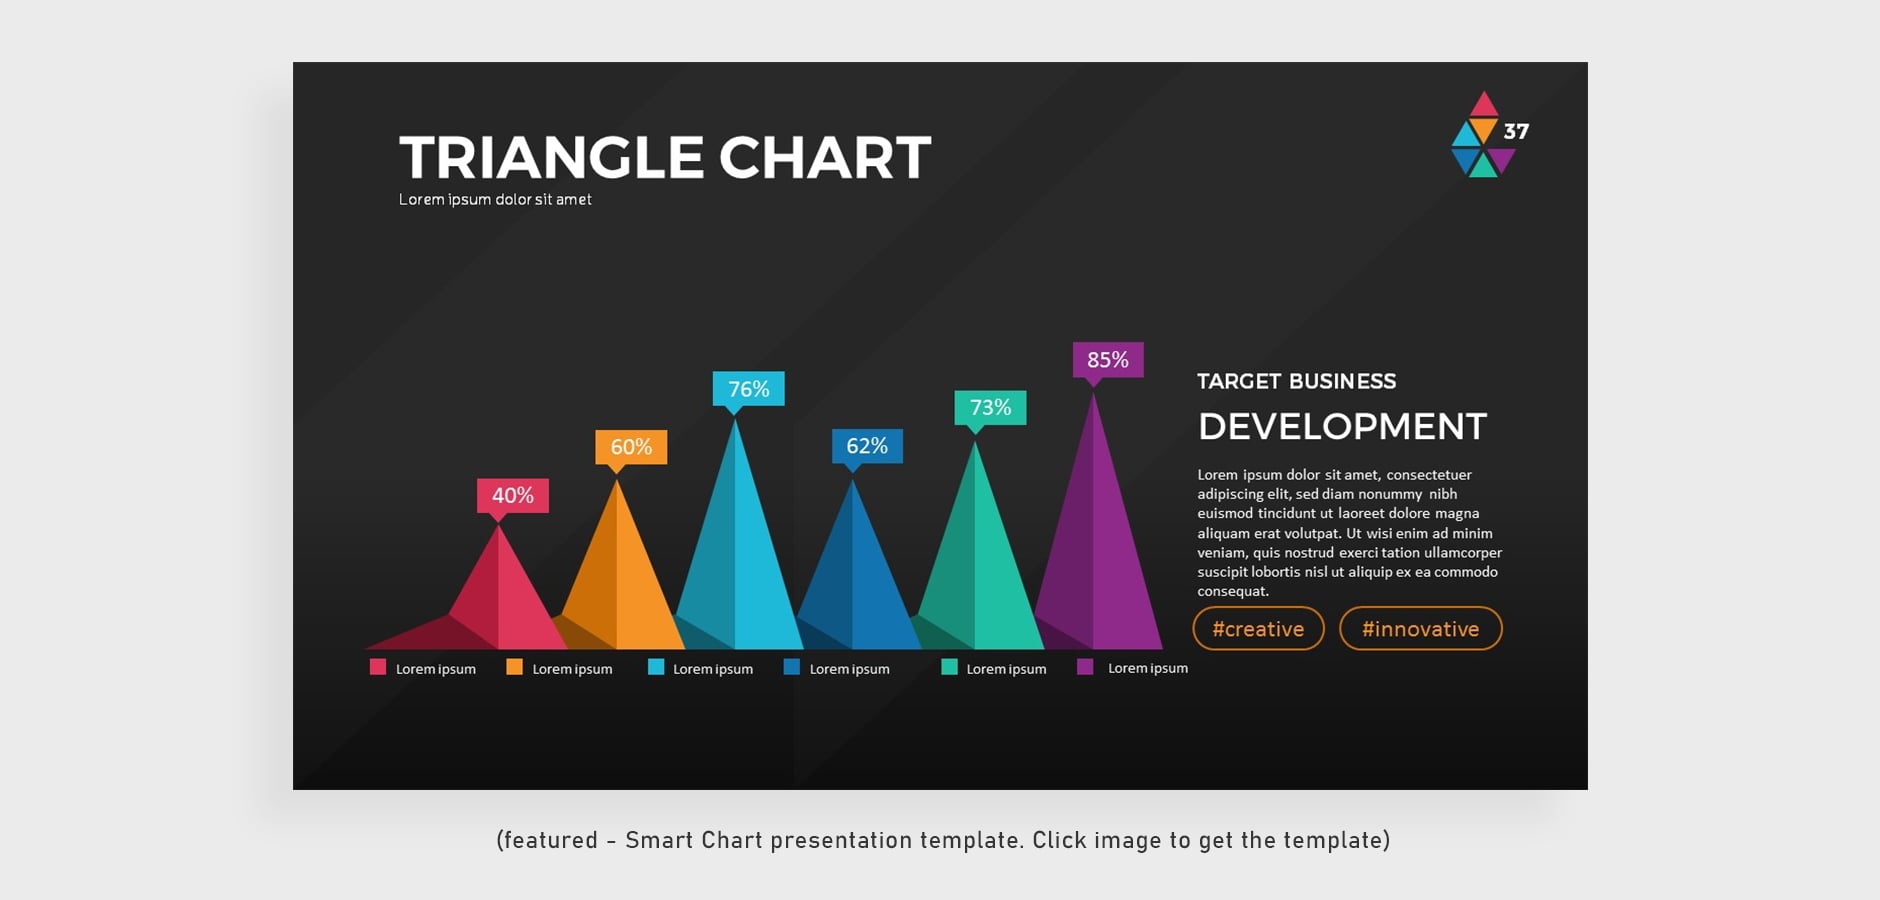
So, you better use colors that not just attract the audience, but also make it understandable and data-friendly.
How to organize long texts
If it is possible, don’t display long texts. Just write the main point and explain the rest by speaking. This way, your audience will get the messages right away and they will be more interested in hearing the rest of it. But, if all texts are essential and you need them to be in the slide, you can do one of these methods.
Step 1: Separate it into two slides
By separating your long text into two slides of PowerPoint presentation, your slides will be less crowded, and at the same time, you will also increase the readability of your slides.

Step 2: Divide the paragraphs as points
No. Not bullet points that all you guys hate. Instead, use a shape to differentiate each point and icons to replace the bullets.
Numberings are also practical if you can’t decide which icon to use.
Step 3: Insert a picture or illustration that represent the information
Your audience might not read the whole text you present, so it will be beneficial if you put an image or illustration. Aside from grabbing the audience’s attention, image is also useful to represent the complete information so your message will be passed on clearly.
And that’s the simple way how to organize your long texts and charts in your presentation deck. If you don’t have any design skills to design your slide, you can use presentation assets that provide editable charts and text layout. All you need to do is paste your content there, and it’s done. You can download whatsoever template you need here.
PowerPoint Design Guide 04: How to Add Creative Bullet Points
In this section, you will discover that bullet points can help to make your content clear and concise for your audience. Just follow the step by step below:

Step 1: Create a new PowerPoint presentation
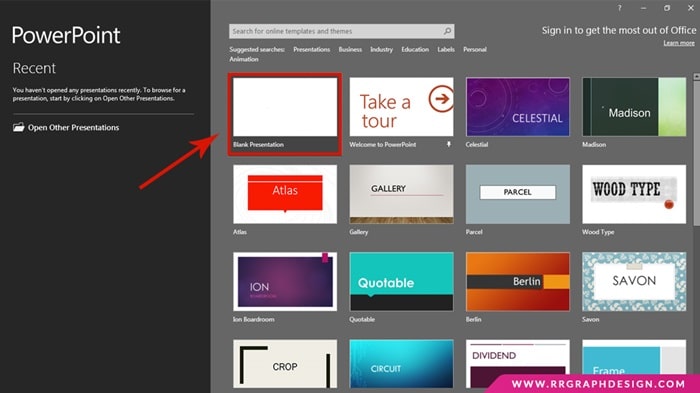
Create a new document file or edit the existing ones.
Step 2: Choose where you want to make a bullet level
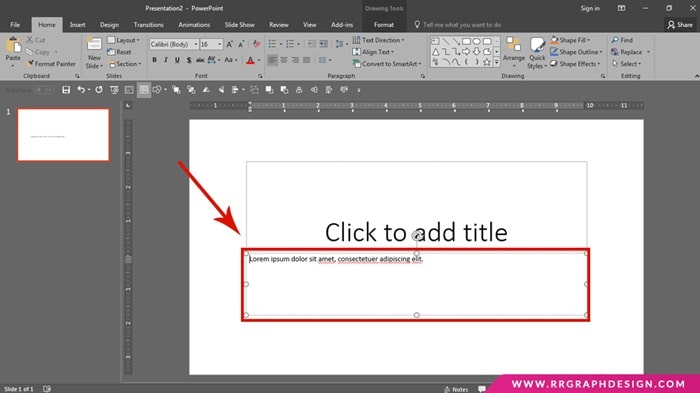
Put your cursor in the dialog box where you need to put the bullet points.
Step 3: Open the “Bullets and Numbering” dialog
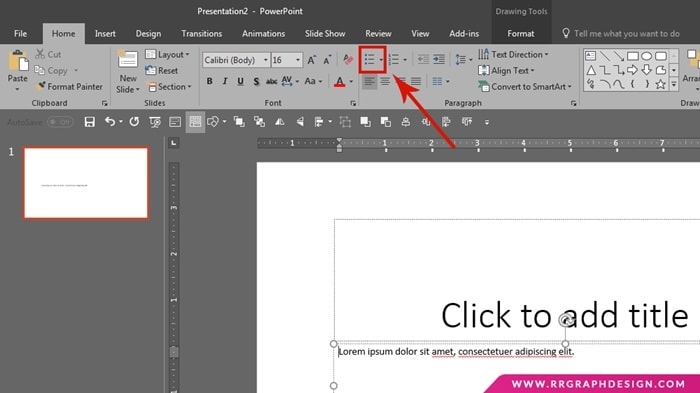
In PowerPoint 2016, the bullet point dialog is below the “Home” ribbon within the “Paragraph” menu.
Step 4: The preset bullet options will pop out
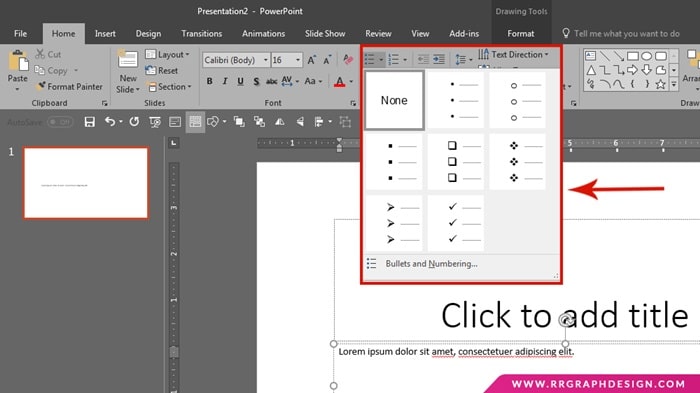
There will be eight preset PowerPoint bullet codecs. Use the arrow keys to maneuver to the PowerPoint default bullet codecs that you simply wish to use. Press “Enter” or click one of the real bullets.
Step 5: Click the “Customize” button
If you’re not satisfied with the presets, you can simply customize it. Go to the “Bullets and Numbering” dialog and click on the “Customize” button.
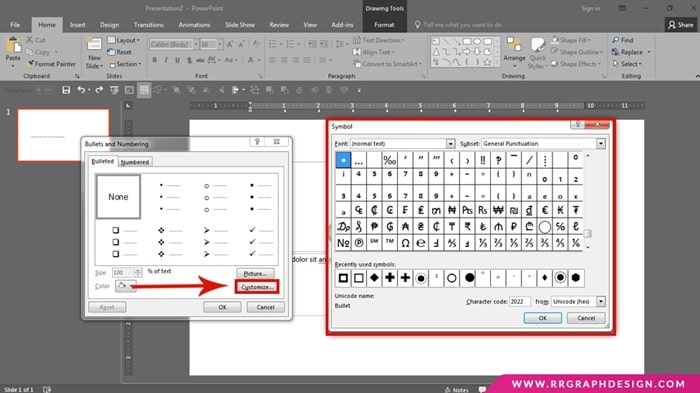
Select PowerPoint bullet formats from those extra symbols. Click the symbol you wish to use and click “OK.”
Step 6: Or, pick the image format bullet from your PC
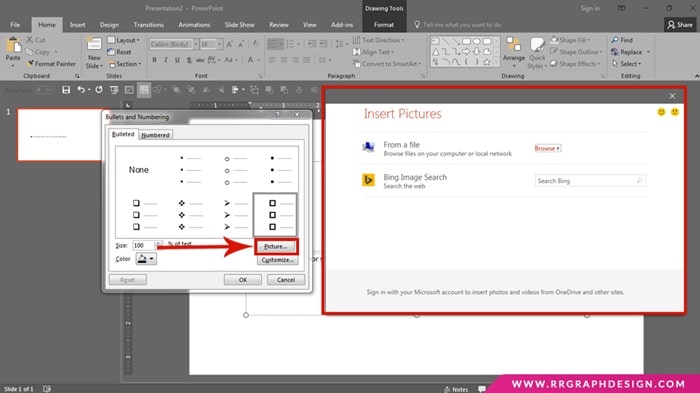
You may also add your bullet image format from your PC. Go to the “Bullets and Numbering” dialog and click on the “Picture” button. Select the pictures and click on the “Import” button to make it as an individual image. Click “OK. “
Step 7: Adjust it for your needs
You may change the size of your bullet by scrolling it up.
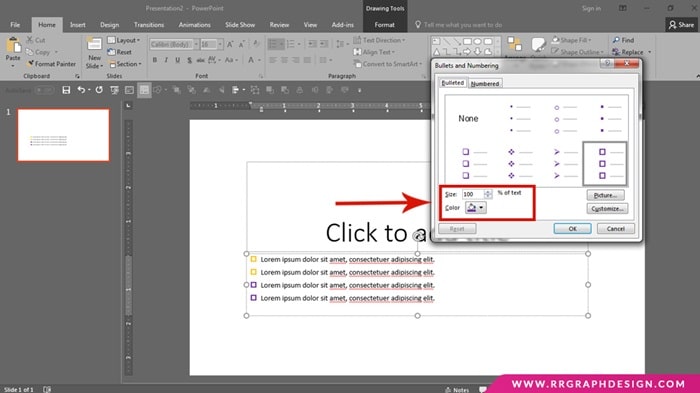
Moreover, you may as well change its color depending on your presentation style! Super easy, right? That is all you need to know on How to Add Creative Bullet Points in PowerPoint.
See also: How to Convert PowerPoint to Word Just One Minute
PowerPoint Design Guide 05: How to Create a Cool Animation Effect
Animations can be added in your PowerPoint to uplift its aptitude. You can animate each object on a slide or simply by creating transitions between slides.

All you need is to master everything in the “Animations” tab and acknowledge how to utilize its settings. Below are step by step you can follow:
Step 1: Open your PowerPoint file
Just so you know, animation may also work with another software, like Google Slides or OpenOffice Impress.

However, please take in your notes that the interface on that app would be different.
Step 2: Click the object you want to animate
You can click on the texts, shapes, and pictures to animate.
Click at the border of the content box, and PowerPoint will automatically distinguish content by a paragraph or bullet break.
Step 3: Go to “Animations” tab
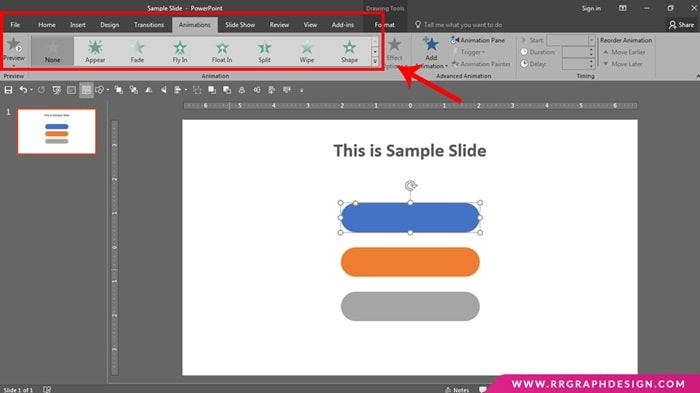
It is located on the top menu bar and can show quite a lot of animation choices and controls.
Step 4: Pick the animation you want to apply
The animation effects are displayed in four categories: entrances, exits, emphasis, and paths. The latest chosen animation effect will be automatically set to your animation pane.
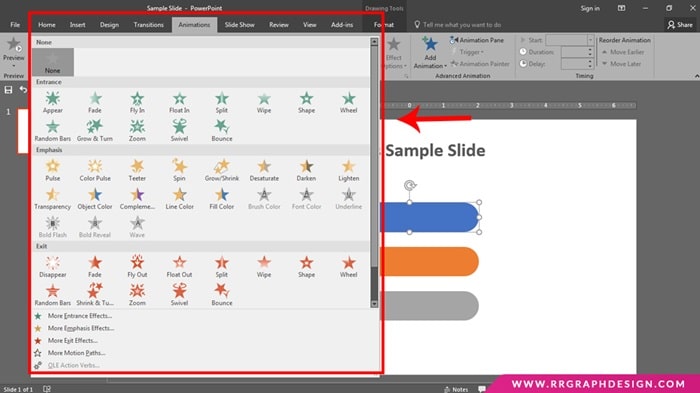
You can click “Animations” to look for those effects. Entrance animation is how an object enters the web page. Exit animation is how an object leaves the web page. Emphasis animations is a motion or highlights to deliver consideration to an object. Paths determine a course of motion for a particular object on the web page.
Step 5: Click “Add Animation”
The button will help you to add more animations in the same object.
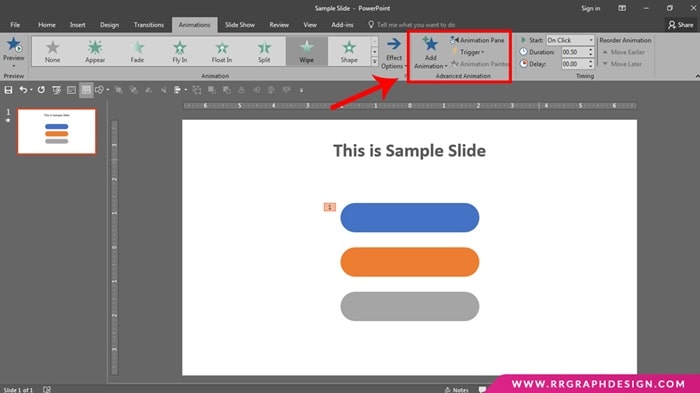
Afterward, some numbers will appear as indications that your animation effect has applied to the object. You may add as many animations to an object as you want!
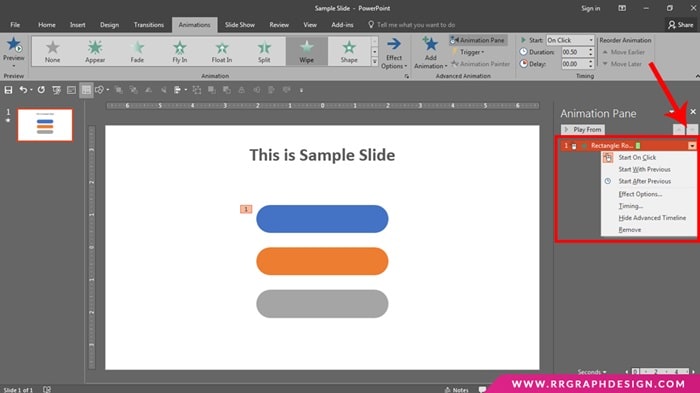
Step 6: Open “Animation pane” (non-compulsory)
The Animation Pane is a tool that displays the list of animated objects on your slide.
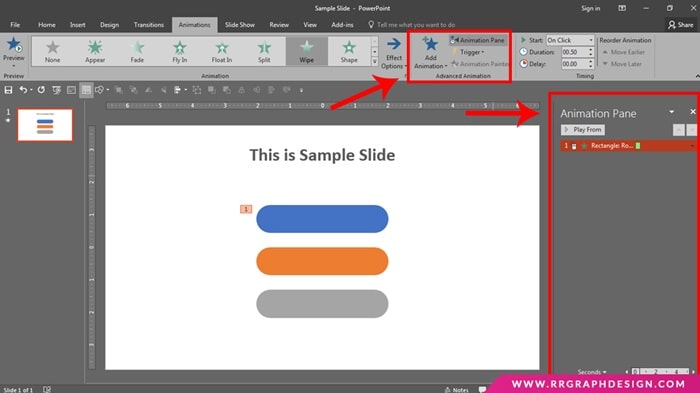
If you have several animated objects, such as text and images, make the animation play sequentially, not all at the same time.
Step 7: Adjust the momentum of your animation
Choose one out of “Start on Click,” “After Previous,” or “With Previous” from the “Start” drop-down menu. “Start on Click” will maintain the animation till you click your pointer.
“After Previous” will begin the animation after any previous animation (or when the slide seems if there are not any different animations). “With Previous” will play the animation simultaneously, the earlier animation on that slide.
Step 8: Set your timing
Delay your animation. Click on the up or down arrows after “Delay” within the “Timing” part to vary the time delay that happens earlier than an animation takes place.

If “On Click” is chosen, the delay will begin after you click something on your slide. You may also change the animation duration, and you can make the effect last until you change your slide. Or, you can reorder animations to maneuver an animation earlier or later in the queue.
Step 9: Add sound effects!
In the Animation Pane, click the down arrow and choose “Effect Choices”. Go to the “Effect” tab and select “Enhancements” to add your sound from the list, otherwise you can add one manually.
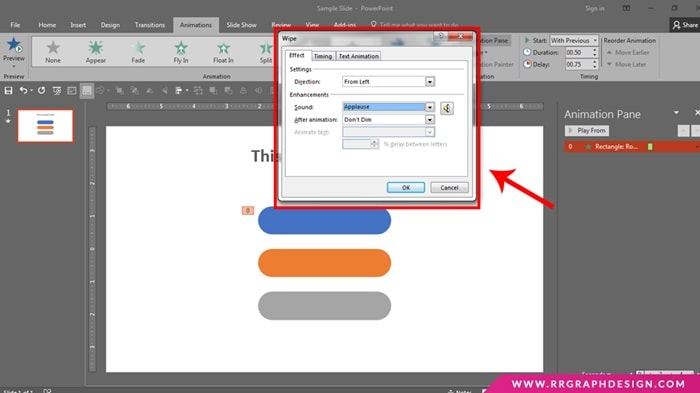
To add a sound manually, open up a window to browse for the sound file in your laptop, quick and easy.
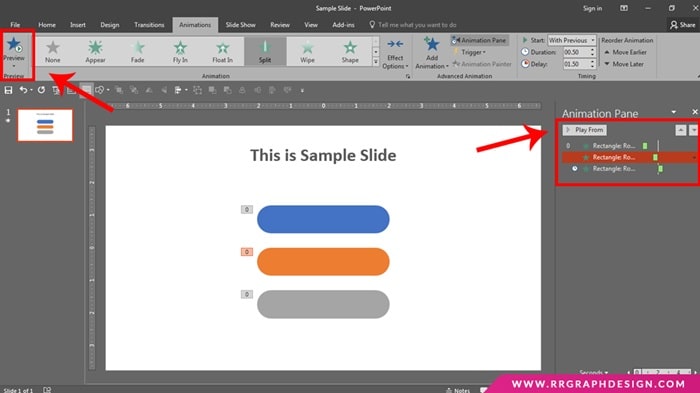
Step 10: Click “Preview
This button is on the left Animations tab and can run the animations on the chosen slide. There is also a button called “Play Form” on the right panel. This button can be used to play animation too. But, the animation will start from the selected object.
Finish! Now you can create a cool animation effect in PowerPoint.
See also: How to Screen Record Using PowerPoint, That’s Very Simple!
PowerPoint Design Guide 06: How to Add Slide Transitions in PowerPoint
After you have learned how to add animation effects on presentation, there is another thing that is worth learning.

We call it slide transitions. This thing has a lot to do with the “Transitions” tab. Below is a more detailed explanation:
Step 1: Open PowerPoint
This method may also work for Google Slides or OpenOffice Impress.
However, the button areas and choices may be distinct.
Step 2: Go to “Transitions” tab
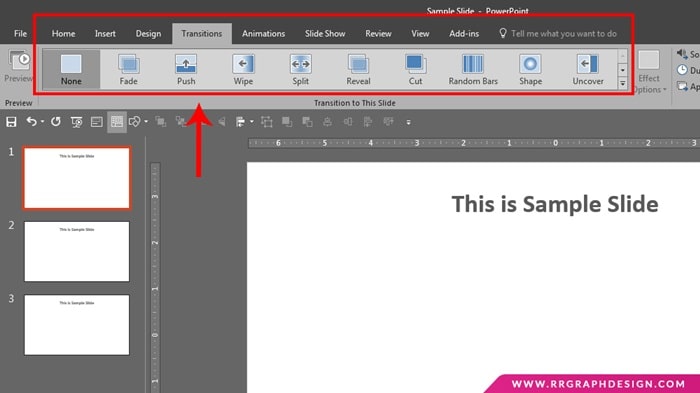
The bar is located on the top menu. It contains a series of animated transition options and controls.
Step 3: Choose the slide
Pick the slide where you need to add the transition.
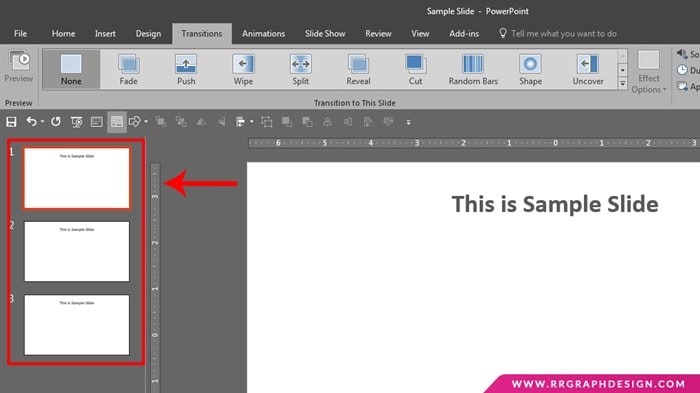
Your slides are displayed in a panel on the left side of the display screen.
Step 4: Choose the transition effect
There will be an indication, shown by a star symbol, on the slide that has a transition effect.
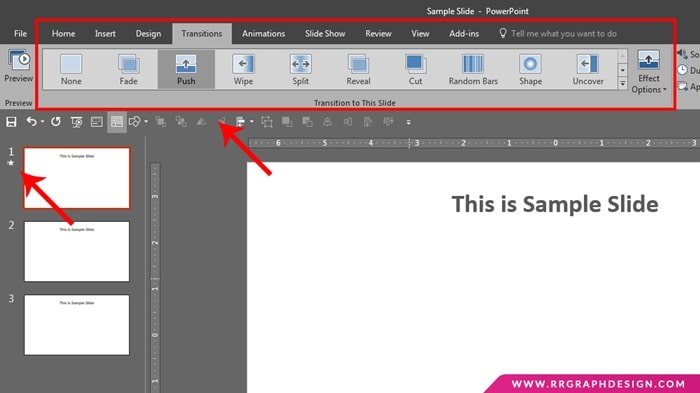
Choose “None” on to delete an inevitable transition. You may only add a single transition per slide.
Step 5: Click “Effect Options”
In the effect options, there will be a list of modifications you can apply.
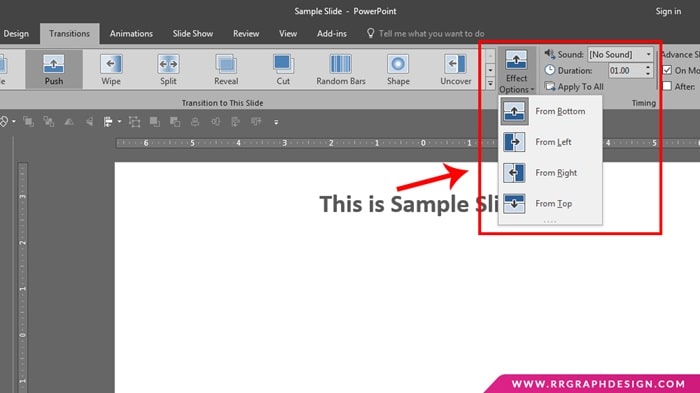
There, you may adjust how the transition will start with changing its direction.
Step 6: Mark “On Mouse Click”
Once you mark the checkbox, the transition won’t happen until you click on that appeared to slide.
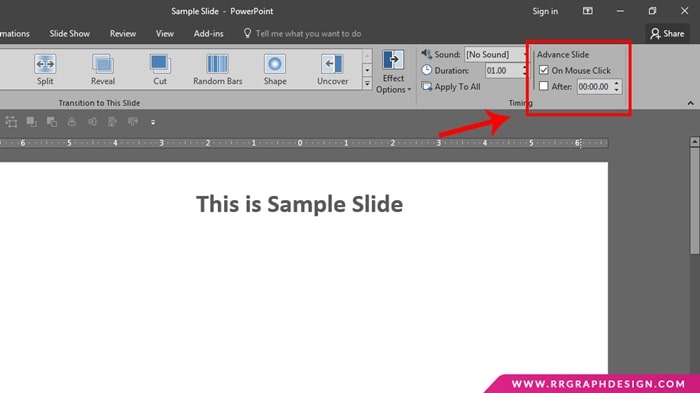
”On Mouse Click” is chosen by default.
Step 7: Adjust the transition length
For advance, click the up and down arrows to set the speed of the transitions.

Higher duration means a slower transition.
Step 8: Select sound effect
There will be a drop-down menu to add a sound effect that may play through the transition.
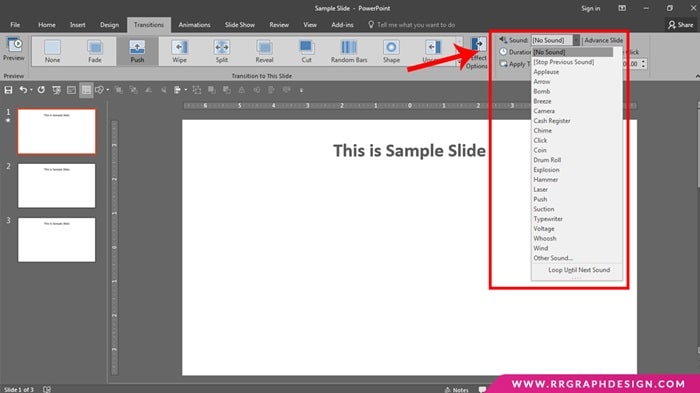
Select “No Sound” if you want to remove any added sound effect.
Step 9: Click “Preview”

This button is on the left of the Transitions tab. It will show the transition and any added effects for the selected slide.
Well done! Now it is your turn to add slide transitions!
See also: How to Remove a Hidden Footer from PowerPoint That Stuck in a Slide
PowerPoint Design Guide 07: How to Reduce Your PowerPoint File Size
If your presentation uses so many high-quality images, the file size can balloon quickly. We don’t want to discourage the use of striking photographs in your presentation; however, they may add depth and character to what could otherwise just be bullets on a slide.

So without necessarily deleting those cool images, here is how to reduce your PowerPoint file size:
Step 1: Crop your images
Make sure that all the images are inside the borders of the slide. Anything outside the edges won’t show up in your slideshow and is just taking up space. Don’t worry if you screw up or want to change the borders again; anything you crop out of the image is still saved and can be adjusted by selecting the “Crop” tool again.
Step 2: Compress your images
Click on any image in your presentation and go back to the “Format” tab in the upper right. From there, go to the “Compress Pictures” option, it will bring up a panel with a few options. Take a look at the “Compression Options” at the top of the panel. Uncheck the “Apply Only to This Picture”, this will ensure that the rest of the changes you make will repeat for all the images in your presentation. In “Delete Cropped Areas of Pictures” you can crop pictures and erase that data to save precious kilobytes, but make sure to place your images where you want them before you do this.
The second set of options on this panel is “Target Output” where you can specify the resolution of the images. Select “Use Document Resolution” to automatically set all images to 72dpi (dots per inch), which is the standard resolution of a computer screen. Anything higher than that takes up space but won’t have any effect unless you print your presentation.
Click OK, and PowerPoint will apply these options to your images. Save your presentation and recheck the file size. Everything should be feeling much lighter at this point.
Step 3: Delete master slides
If the file is still too big, there are a few other things you can do to trim the fat. If you use a corporate template, you may bloat your presentation with master slides that aren’t being used. Click the “View” tab in your top bar, then click “Slide Master” to open up the master view. Instead of your presentation, you should see several blank slides that may have a logo or page number, but no content. Scroll through these and find any that you haven’t used in your presentation, then delete them.
Sometimes, you may find yourself repeating one image on multiple successive slides to animate your content in a certain way. Try consolidating the image to one slide by making it the background of a master slide and using the entrance and exit effects in the “Animations” tab to get the same result.
Step 4: Embed custom fonts
Using custom fonts is a mixed bag in PowerPoint. On the one hand, you’ll make your presentation stand out with a unique, bold type. However, the display won’t work correctly for anyone who doesn’t have that font. You can embed your custom fonts by clicking on the “File” tab and then on “Options” to bring up the options panel. Go to the “Save” tab and look for the option labeled “Embed Fonts in the File”, this will increase the file size, but you can mitigate this by checking “Embed Only the Characters Used in the Presentation.”
That is all! Now you can reduce your PowerPoint file size quickly. If you followed these instructions, your presentation should be down to a manageable size that you can send via email. Keep in mind that if you put large images on every slide or video (which cannot be compressed in PowerPoint), your file may still be too large. In this case, there isn’t much you can do about it, so I would recommend using a file-sharing service to share it.
See also: How to Embed Fonts in PowerPoint into Various Platforms
PowerPoint Design Guide 08: How to Make Engaging Business Presentation
A good presentation certainly can engage more audiences. It can be your business weapon to show your business to a higher level.

And here we are, let us show you three tips to help you increase the value of your presentation!
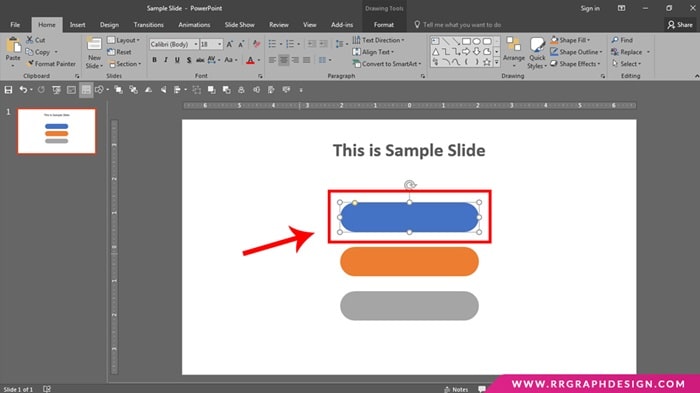
Step 1: Show off your brand identity
Like any other marketing resources, your presentation slides should consist of your brand value. Your slide decks should emphasize your whole company characteristics.

Take a look at the image above. All slides are in match colors, while the texts, elements, and logo go very well together. You can also consider your company’s works whether it reflects hi-tech, travelling, education, and et cetera.
Step 2: Show your great team
If you want to connect with your audience, incorporate photos of your offices, customers with your products and even employees into your slides. There is no doubt that once your company’s services and mission interest your audiences, they will be curious about who the team is behind it.

That’s right. Show your great team. Introduce them and make your audience know them. There are many ways to make your business presentation more engaging, and you can hire a service or simply buy a presentation template that suits your needs.
Step 3: Show your company theme
It is needed to acknowledge your slides should not be so-so and generic that they serve every possible presentation purpose (ineffectively).

Instead, your presentation should be designed and optimized specifically for your particular topic and audience.
See also: How to Add Music to PowerPoint for Mesmerizing Your Audiences
PowerPoint Design Guide 09: Some Saying from Famous Designers
PowerPoint design is boring, that is somehow true. The tool is always intertwined with a weary and endless meeting, slide with full of texts, and other uninteresting things. That is such an ‘old-school’ opinion about PowerPoint presentation.

Nowadays, PowerPoint can be your ultimate weapon to give information with exciting visuals. A good-crafted PowerPoint design can be the greatest weapon to persuade your client. More than that, designers can quickly sell their ideas with a piece of well-designed presentation. Just like these quotes:
Effective presentations often structurally echo other useful storytelling modes like movies, novels, plays, and games. — Mike Tyson, a design director in branding agency Siegel+Gale‘s New York office.
To make a PowerPoint design presentation that engages audiences, it needs more than a bulk of paragraphs and random backgrounds. It requires a proper plan that determines what specific topic will appear in each slide. With a proper plan, you can build the audience’s trust. Quick tips: Don’t discuss more than one topic in one slide. Focus on one problem or information that you want to talk about.
For the most part, people aren’t reading the slides. You want to start a conversation and have a dialogue. — Meg Beckum, a creative director at the brand engagement firm Sullivan.
Give more room for your visual parts of a presentation. Audiences will enjoy reading visually attractive infographics than a bunch of boring paragraphs. Make it simple enough to understand. But, don’t forget to give some little details to complete your PowerPoint design presentation just as a matching header/footer, suitable fonts, and a stunning color scheme.
Write one headline per slide, then lay them out so that you can see your story—in the form of headlines—come to life. These allow you to move slides around and adjust captions. — Sandra Johnson, owner of Presentation Wiz in Green Bay, Wisconsin.
She advises walking away from the computer entirely at this stage because although PowerPoint design is a powerful tool for delivering a presentation, it’s lousy for writing one. Instead, create the headlines for your slides on Post-It notes, sheets of paper, or a sketchpad. Make sure your story has a clear beginning, middle, and end. Once you have the bones of the presentation laid out, then you can write your script.
See also: How To Restore Unsaved PowerPoint Presentation? We Provide You with A Few Tricks
Closing
What do you think about this all-in-one PowerPoint design tips, tricks, and ideas guide for beginners? If you have any ideas or feedback, don’t hesitate to drop it in the comment.
Let’s visit RRSlide to download free PowerPoint presentation templates with many categories. But wait, don’t go anywhere and stay here with our Blog to keep up-to-date on all the best pitch deck template collections and design advice from our PowerPoint experts yet to come!